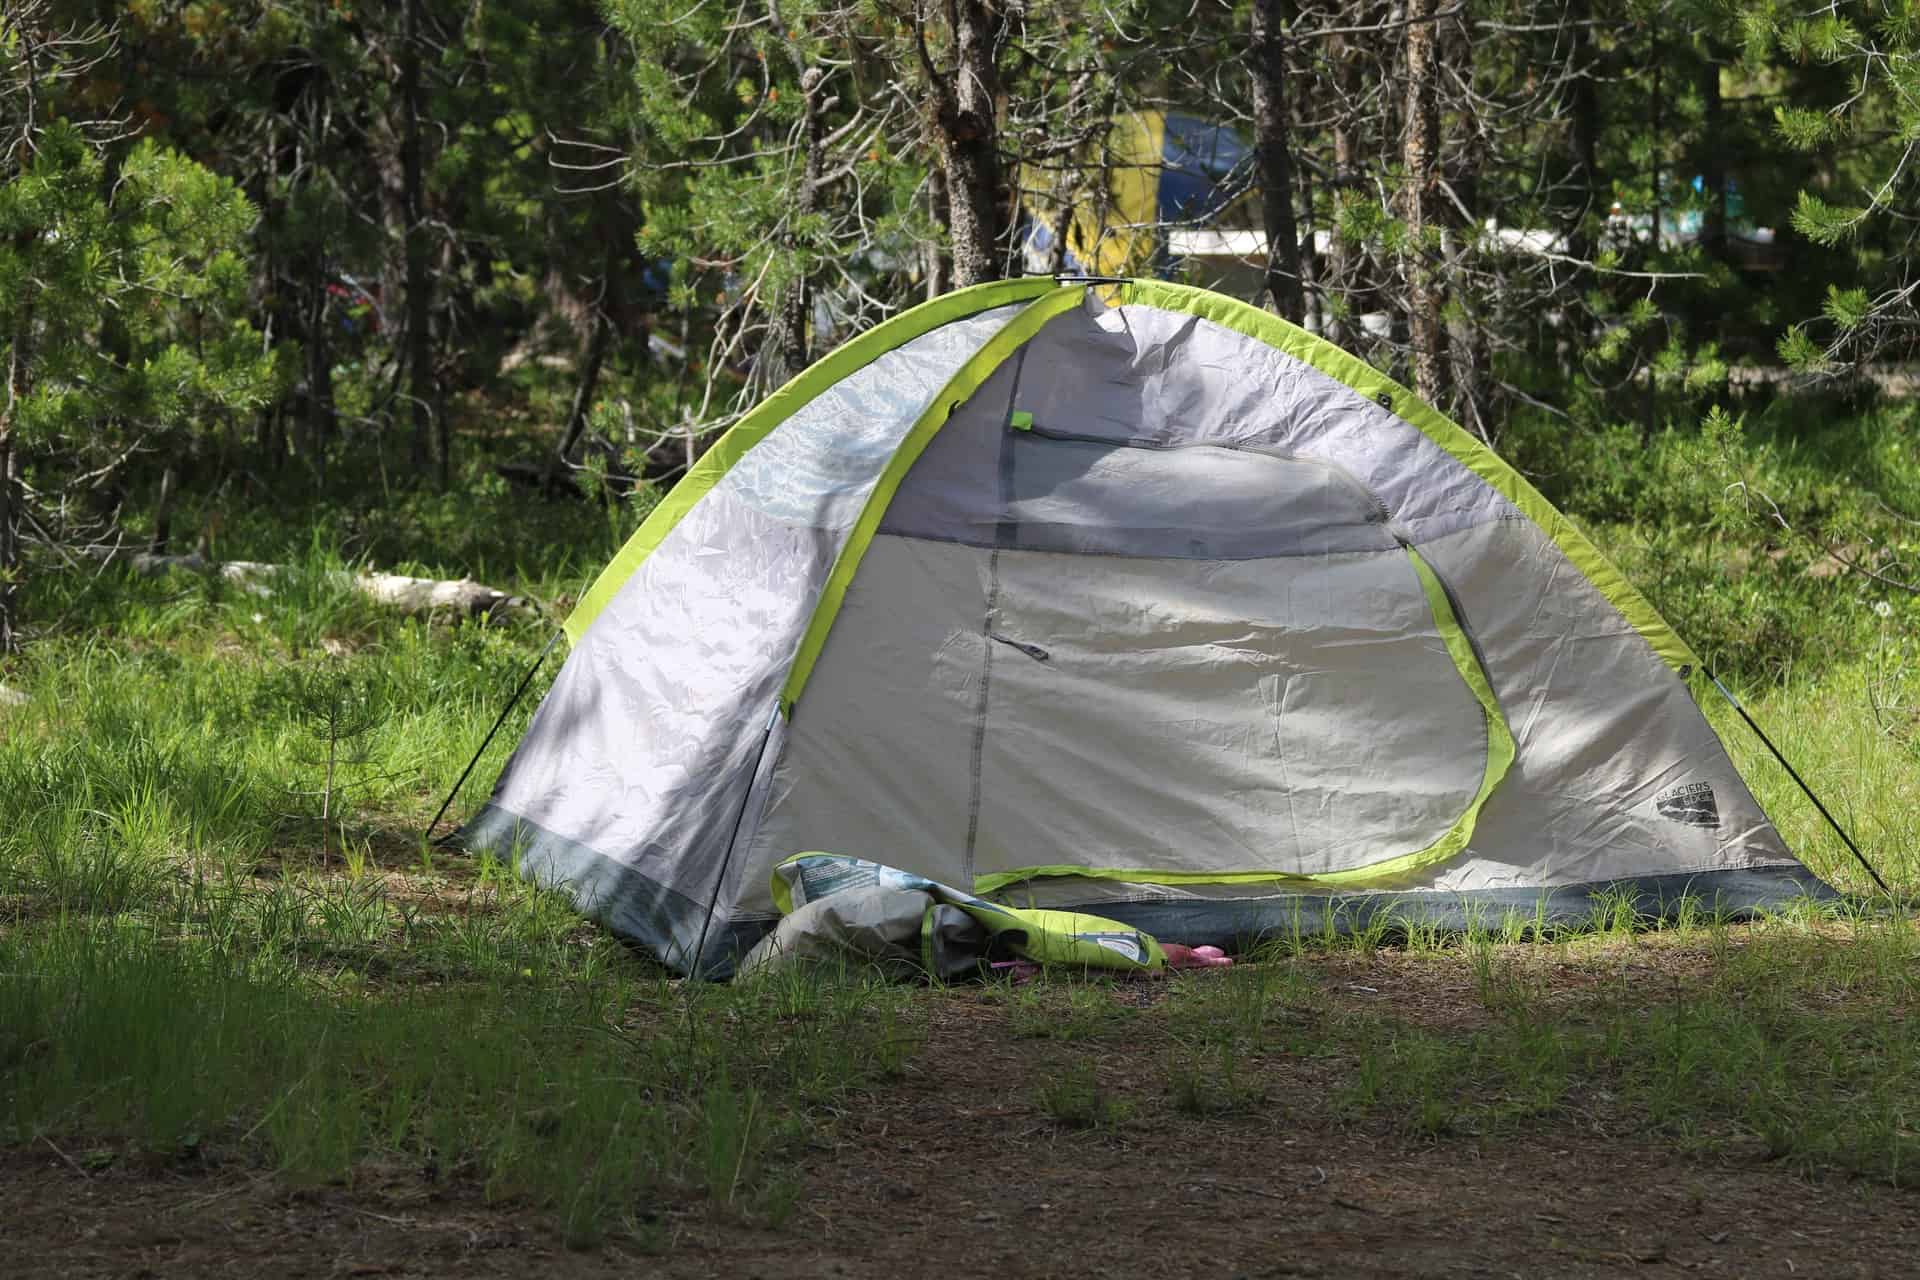
Whether you’re going camping solo or bringing along the whole family, you’re going to need a tent. If you’re a first-time camper, then it can seem confusing.
You pull out your tent and realize that there’s a ton of poles, stakes, and other material that needs to be put together properly in order to keep you safe and comfortable all night long.
Setting up & staking your tent can distract you from the fun and exciting mood that camping brings.
You and your family’s positive attitudes can be riding high after a long day enjoying the wilderness. But when it comes time to set up the tent, arguments break out and the cheerful atmosphere gets interrupted.
Avoid that negativity by learning how to stake your tent properly before you set out on your camping adventure.
You’ll impress your family with how quickly you can set up your tent and provide them, and yourself, with a shelter that will keep you protected and comfortable all night long.
Picking the Right Location
Staking your tent can be a simple job as long as you find the right location. It can be tempting after a long day of hiking and playing in the wilderness to pitch your tent in the first open area you come across, but this isn’t always the best idea.
At the end of a long day of outdoor exploration and fun, you’re tired, hungry, and ready to settle down for the night. Choosing the right location will prevent you from wasting precious time and energy fighting to stake your tent down.

The first thing you want to consider is the ground’s incline. Remember, you’re going to be sleeping here and you want to be as comfortable as possible. Find a spot where the ground is mostly level and devoid of big rocks or tree roots.
Not only will rocks and tree roots make for an uncomfortable night’s sleep, they’ll also make staking your tent a rough job.
You could even break a stake if you try pounding it into the ground only for it to slam against a large rock. That wouldn’t be a good way to end your day!
Staking your tent is going to be easier on hard, dense soil, so avoid areas that are very soft, sandy, or muddy. A slight wind could pull out your stakes and blow your tent over if you try to stake it on soft ground.
The wind is an obstacle that you’re going to want to minimize as much as possible. Try to set up your tent near a natural windbreak such as a grouping of trees or large rocks and shrubbery.
If you can’t find any natural windbreaks in your area, then consider making one yourself by stacking tree branches.
Also Read: Tent Security: 12 Tips to Stay Safe While Camping
Easy Steps to Stake a Tent
Staking your tent can be a quick and easy job once you know what you’re doing. Following these steps will help you stay organized and stake your tent in no time.
1. Prepare Your Site
Before you can begin staking your tent, you need to choose the right location and then prepare the area. You’ll want to clear your campsite of any large branches or rocks and make sure you have a clear path to get in and out of your tent. When nature calls in the middle of the night, you don’t want to be stumbling over branches to do your business!
2. Lay Out Your Tent and Materials
Start getting your tenting materials ready. Lay the tent itself stretched out flat in the spot you want to pitch it. Get the poles and guylines organized so you know what goes where.
3. Stake Your Tent
You’ll want to start with opposite corners when staking your tent. Drive them straight into the ground. Keeping your stakes vertical instead of sitting at an angle will provide more stability and strength against winds or a rainstorm. You’ll want to use a strong rock or a special staking hammer to pound those stakes into the ground.
4. Assemble Your Tent
Once your tent is firmly staked in place, it’s time to assemble the rest of the tent. This will look slightly different depending on which tent you’ve brought along, but you want to make sure your tent has been properly assembled. Make sure your poles are properly connected and in the right places.
5. Tie Your Guylines
Your guylines are your best friend when you’re camping. They provide extra stability when staking your tent and help your tent keep its shape even in strong winds. Simply tie a strong knot to the guyout point, pull the guyline away from the pole that it’s underneath, loop the other end around one of your stakes and pull to tighten
"Once you’ve followed these steps, you’re done! Your tent is ready to withstand any weather nature is going to throw at it and you can begin relaxing for the evening. You’ll sleep better knowing that your tent is properly secured and able to provide you with the shelter you need."
Avoid Common Staking Mistakes
Beginners and pros alike can easily make a mistake when staking their tent. Sometimes after a long day of hiking, swimming, and enjoying the outdoors, it can seem like a boring chore to set up your tent properly.
Here are some of the most common mistakes campers make when staking their tent and how you can avoid them.
1. Using the Wrong Stakes
The stake that you’ll need will depend on where you’ve chosen to camp. There are different stakes for hard or soft soil, sand, and even snow. Do your research ahead of time to make sure you’re bringing along the best stakes for the terrain you’re camping on.
2. Not Driving the Stakes Far Enough
Stakes are made to keep your tent upright and stable despite winds and rainstorms. If you don’t drive your stake all the way into the ground, then you’re compromising your tent’s stability.
The last thing you want is for your tent to fly away from you in the middle of the night, so be sure to pound those stakes all the way into the ground.
3. Driving Stakes in At An Angle
It’s recommended to drive your stakes down vertically, not at an angle. The reason for that is if your stakes aren’t secure in the ground then they’ll come out more easily.
Driving them straight down into the ground will allow them to stay in place even during strong weather.
4. Not Checking Your Hooks
Tent stakes come with little hooks where you can loop your guylines. These hooks should be facing away from your tent. It will help provide more stability for your tent and your guylines.
5. Not Tightening Your Guylines
Your guylines are essential for keeping your tent stable throughout the night. After you assemble your tent, you should pull the guylines tight until your tent is taut. This will give your tent the best support to help it withstand strong wind and rains.
6. Forgetting to Support Weak Stakes
Sometimes, a camper can do everything right and still be left with a weak stake. You made sure to hammer it in vertically, you know you have the right stake for the type of ground you’re camping on, and yet it’s still wobbly and unstable.
Thankfully, nature provides us with the tools we need to support weak stakes. Simply place a large rock or log over or up against your weak stake to help hold it in place.
Choosing the Right Stakes
For most campers, the stakes you’re going to be using are the ones that came with your tent. There are only a few instances in which you’d need to go out and buy different stakes.
If you’re going to be pitching your tent on sand or ground that isn’t hard and sturdy, then you’re going to need a specific set of stakes.
Finding the right stakes for your journey can be difficult if you don’t know where to start. Here are some tips to help you get the most out of your camping trip.
Also Read: What Are Tents Made Of?
V-Stakes
These stakes are easily identified by their ‘v’ shape and are often made of durable metal or plastic.
If you’re going to be staking your tent in sandy or rough, rocky terrain then you should get a set of v-stakes.
Your guyline will sit in the notch of the v-shape for extra stability. These stakes are guaranteed to hold up against hidden rocks underground.
Nail Stake
Nail stakes get their name from their shape. They’re made out of strong materials such as titanium or steel and have a pointed tip with a flat, plastic piece on the top.
You can attach your guyline around the plastic piece after driving the pointed end into the ground. These stakes are a durable, lightweight option that works best for single or 2-person tents.
Y-Stake
These stakes are going to be slightly heavier and more expensive than the other options on this list.
They offer a unique design that provides you with the stability you need even in the rockiest terrain.
Y-stakes are considered to work well in any terrain because their shape keeps them from bending and breaking.
Snow Stake
If you’re going to be camping in a snowy area then you don’t want to rely on any old stake to do the job.
Snow stakes are long, curved, and have several holes that will freeze during the night, which gives them more staying power. Their design will keep them in place and allow them to penetrate the frozen ground.
Snow stakes are going to be heavier and more expensive than your average ground stakes, but they’re a necessity to staying safe during winter camping.
These stakes also work well in sandy ground and they’re usually a bright orange color, which will make it easier to find them when you’re ready to pack up in the morning.
Easiest Tents to Assemble
Staking your tent is just one aspect of getting your tent ready for the evening. Assembling your tent shouldn’t be a long and arduous process, but when you’re standing in front of a bunch of poles and lines it can look pretty intimidating for beginners.
Some tents are going to be easier to assemble than others and at the end of a long day of exploring the outdoors, you’re going to want something that you can put together without getting a headache.
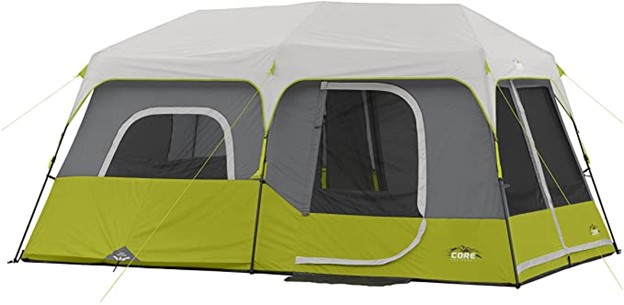
Core 9-Person Cabin Instant Tent
Whether you’re going camping with a group of friends, your family, or both, this tent is going to provide you with a quick set-up and plenty of space.
The size may lead you to think that the assembly process is going to be complicated, but it’s actually quite simple.
The poles are already attached to the fabric so all you have to do is unfold the tent, extend the poles, and attach them to each other.
This tent is going to offer you a ton of space, and the mesh ceilings provide you with an unobstructed view of the starry night sky.
The only downside to this tent is that the mesh ceiling and windows can cause you to get chilly at night. You can remedy that by learning how to insulate your tent for the summer.
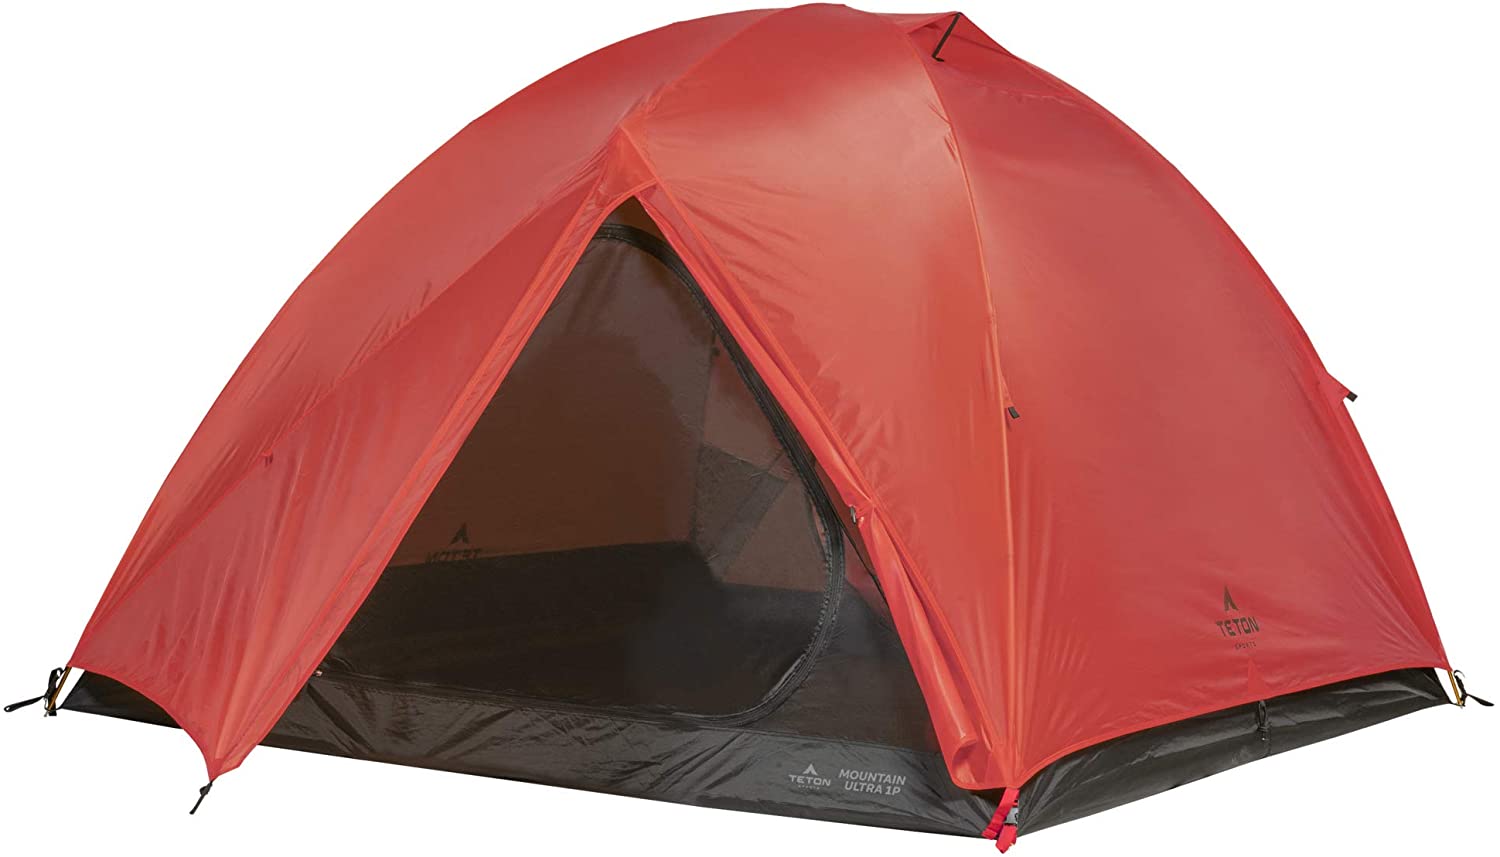
TETON Sports Instant Tent
This tent is going to be ideal if you’re going camping by yourself or with one other person. It’s a versatile, lightweight option for backpackers or campers who want something that they can set up quickly, doesn’t break the bank, and doesn’t add too much weight to their pack.
The TETON Sports Instant Tent is considered a pop up tent because all you have to do to set it up is unfold the tent, lock the pre-attached poles in place, and pull the tent up.
It’s really that easy and should take the average camper less than 60 seconds to complete.
It’s another great option for summer camping because the mesh windows and ceiling allow for maximum airflow. This tent also comes with a rain fly that boasts a waterproof rating.
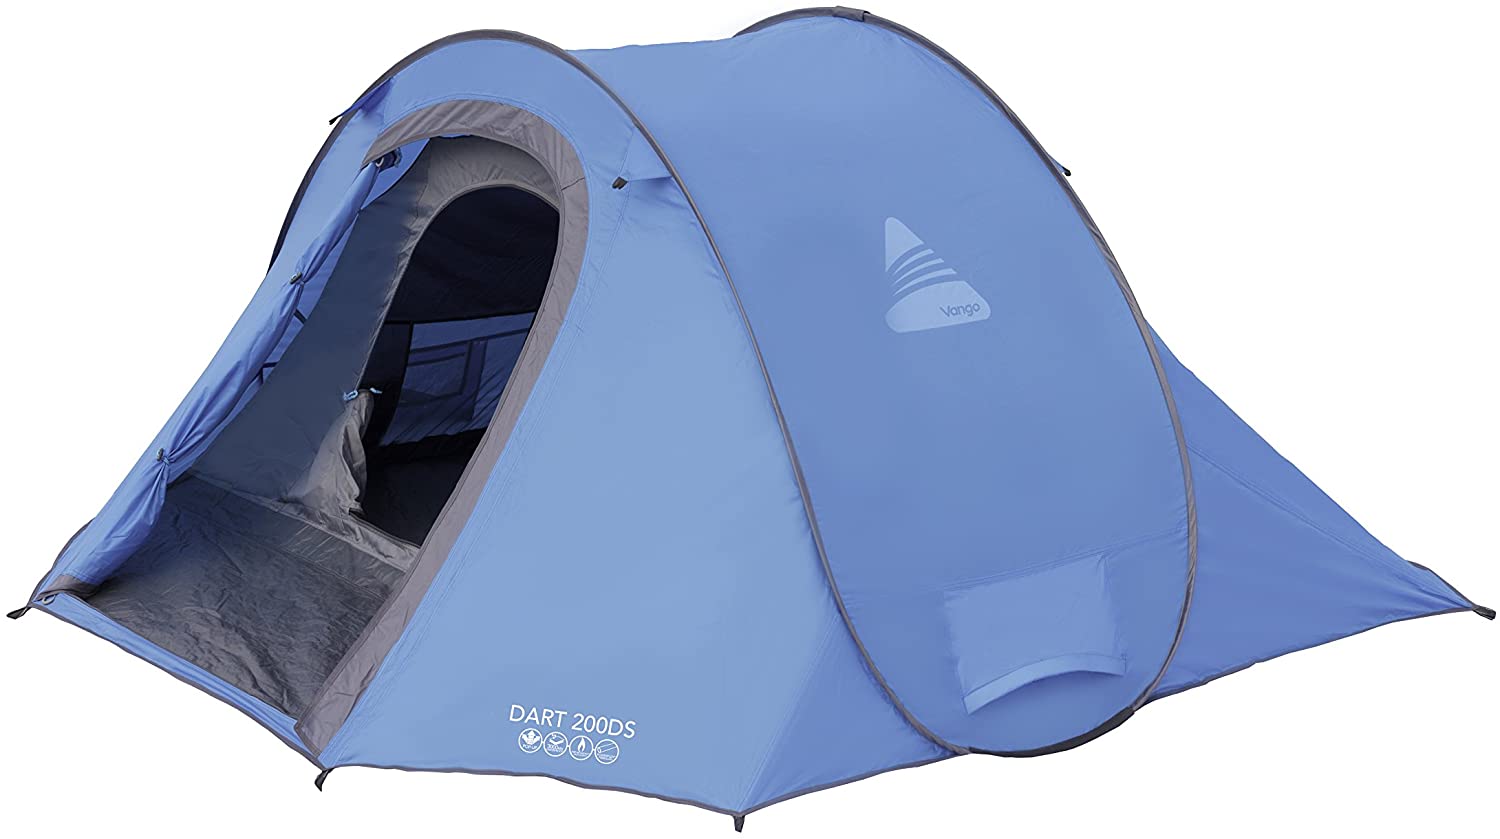
Vango Dart Pop-Up 3-Person Instant Tent
As a pop-up tent, the assembly process for this tent is almost non-existent. All you have to do is take your tent out of its carry bag, watch it pop up into place, and stake it down.
This is by far one of the easiest tents to assemble, which makes it great for beginners or backpackers who expect to be tired after a long day of hiking and don’t want to spend much time fiddling with their tent.
One of the most attractive features this tent provides is a built-in vestibule. This space is perfect for storing your gear at night or taking off wet and dirty shoes or clothing before entering your sleep space.
Another benefit to this tent is the durable, waterproof material guarantees you’ll stay warm and dry all night. If you decide to use this tent during warmer months then you may want to look into ways to keep your tent cool in the summer.
The downside to this tent is its fiberglass poles. These are more likely to shatter or splinter in rough conditions than other materials, which means they may not be the best option for extended camping trips.
Also Read: How To Decorate a Camping Tent?
Enjoying Your Camping Trip
You don’t need to be a seasoned camper to enjoy your camping trip. Whether you’re hiking in the winter or summer, in rough terrain or familiar ground, there is so much enjoyment to be had by spending time in nature.
The physical and mental health benefits are boundless. The best way to get the most out of your camping trip is to be prepared.
Do your research, pick a tent that meets your needs, learn how to properly stake down your tent, and make sure you have all the essential gear you’ll need to get the most out of your trip.
There’s no shortage of hiking trails and campgrounds in this world, and there are a plethora of tips online to help you figure out how to camp no matter what your limitations are.
Go out and hike, camp, or backpack until your heart’s content. Then go out and do it all over again!
For more related guides read my other posts:
About the Author

Hussain is a passionate hiker and traveler that love the outdoor and enjoys what nature has to give, whenever he can he love to write and give tips & honest reviews to help others get out there and just seek more unforgettable experiences.


